


How do you make a background Transparent
In this handy guide, we’ve shared how to make Photoshop a transparent background to isolate random objects and make them more flexible.
- At a Glance of Content :
Use Transparent Images On Photoshop
Cutout Images into White Background in Photoshop
Creating a visible background image in Photoshop is not a difficult task. You can make wallpaper with live pictures at home, but here are these. You need to learn Photoshop and its reverse tools. Different types of Photoshop tools and options are used to remove different types of wallpaper. It varies in the nature and complexity of the picture. You cannot use the same tool without changing the image settings of Soft Edges and Hard Edges. Achieving perfection in creating a visible background for a photo depends on many unavoidable parameters of the Photoshop tool, such as brush size, instability, color change, tolerance, tolerance, etc. that of.
In this tutorial we tried to show you how to make the background visible in Photoshop using the Background tool, just professionally change some settings. If you’re patiently looking at top-down content, you should be able to remove a background from any image, whether it’s a soft field, a flat-edged image, or a hard-edged image. This is a great Photoshop tool where you have to say “Wow!”
How to Make Background Transparent in Photoshop
It usually doesn’t matter if you want to include something on the web or in an advertisement for a particular image, logo, or background.
To remove the background (for example, erase), first go to the Layers panel and copy the image plane. Simply fold the layer with the New Year icon (such as a white square with a curved angle) below the poster.
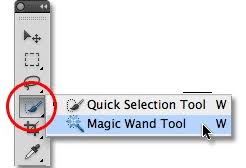
Use Magic Wand Tool to Make Background Transparent in Photoshop
Then go to Toolbar and select Magic Wand (press W). Click on the background and you will see dotted lines around the object and the edges of the image. Now go back to the original background in the palette panel and click on the icon to make the layer invisible. We recommend that you keep this basic level in the project if you want to come back later.
After selecting the duplicate layer, click on remove and then remove the background. You should now see a gray and white background instead of the background, indicating that the background is light.
To delete an object, press Ctrl + D (or Mac Command + D) and the dashed lines will disappear. Now you can use it as real-time graphics without worries.
Make Transparent Background with Background Eraser Tool
-
Open The Image in Photoshop
You can select any image to remove background and get visible background. It is better to choose a different background for the photo, but don’t worry. Our approach to highlighting photo wallpaper is suitable for any type of image.
- Go to the Create New Layer or Layout section at the bottom of the Layer panel and pick up a solid color. Choose a solid color the way you want. The color should contrast with the smooth edge of the lens. Finally, place the layer below the image layer you are working on to remove the background.
- Select the Background Eraser tool and follow the settings shown in the image below. The settings may vary depending on the drawing requirements.
- Then use the eraser on the back to erase the background around the smooth edges. Do this carefully so as not to lose the smooth edges of the lesson, such as hair, hair and so on.
- Finally, you can remove the background using the Pen tool, or you can open the background using the Erase tool. Look at the image below. This is not ideal as it poses a pressing research problem.
The Quick Way to Remove a Background in Photoshop
The next version of this program makes it easier for digital artists. With Photoshop 2020, if your version is at least 21.0.0, you can allow the theme to do everything for you. It effectively presents several simple patterns and it is not difficult to manually choose a very complex plan.
The first step is to make a copy of the original layer. Depending on your operating system, select and copy the entire image Control / Command + A. You can now click the layer icon in the middle of the section to continue the changes between the invisible and the newly created version.
The Properties panel is on the right. Find quick actions in its sections. There you will find the automatic background motion function. Internal processes take some time to find content and remove all unrelated items.
The top score for this item should be given to you against a visible background, indicated by the overall gray and white checkered pattern. You might not see it if you forgot to turn off the back cover before.
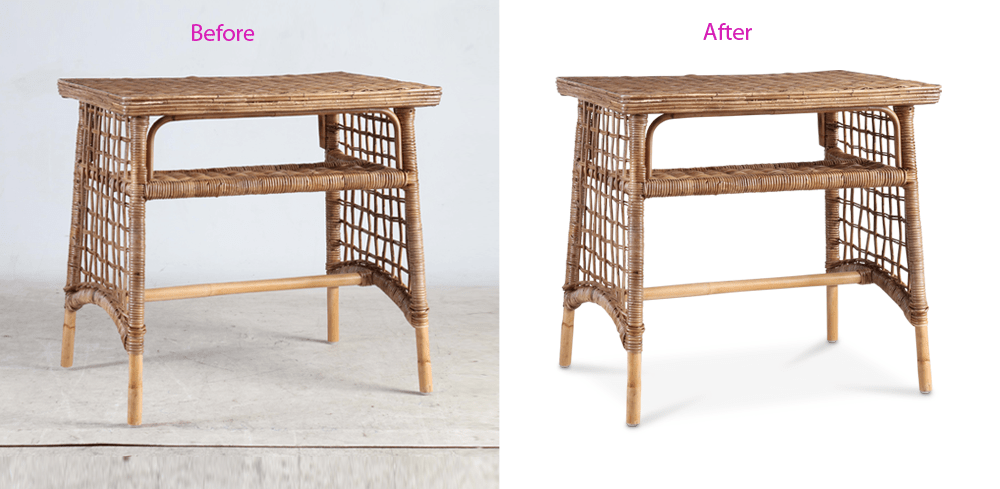
The result looks good for a well-defined element, but in complex cases it may not work well. You can always adjust the edges with a mask, this is an additional automatically created monochrome layer. Select and use the brush to add or delete white or black areas.
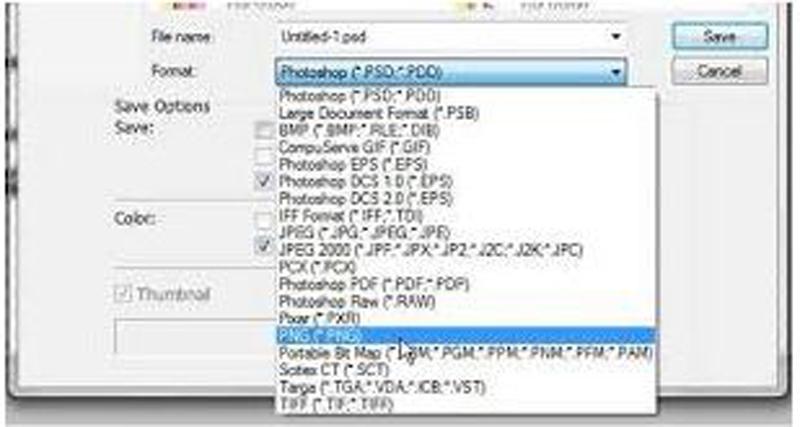
For perfect results, remove the background layer or export it as a ready-to-use PNG file with transparent areas, or save the entire project as a PSD file to reopen it for further processing.
Save PNG Transparent Background
If you are using a screen or PNG image, this is the default transparent background. If you use a JPG or other file format, you must first set the background color in the snagged editor; otherwise it will be white instead of transparent.
To do this, simply click Image> Canvas Color (on Windows) or Image> Change Canvas Color… (on Mac)
If you do not save your image as a PNG file, your background will be clean.
And that’s exactly what the image uses to remove the background. There are just a few steps you can take to create the perfect look for your training materials, marketing materials, or presentations.
How to make background transparent in paint
Microsoft Windows pre-installed application of paint, and pre-installed versions of Windows all day. The application interface that is simple and limited features that make it easy to use. However, Microsoft has added a new version of “Paint 3D” Windows 10 penalty.
How to make a picture’s background in Paint
- Click the ‘Crotona’ button.
- In the search box above, enter “some” and Cortina.
- Click the “Paint” button to open the result.
- Now click on the ‘File’ button.
- Select “Open”.
- Find and select an image to open.
- Then press the Select button.
- “Select the transparency, drop-down list.
- Then click on the “Free Reading Form” in that drop-down menu.
- Slide the cursor to select a clear image area.
- and right-click Select
- Right-click where the rectangle appears.
- Select “Cut” from the menu.
- Sow, open a new picture.
- Press (Ctrl + 5) and paste it in the new part of the image.
- Left-click on the boxes and edit and settings.
How Add Transparent Backgrounds to images in Paint 3D
The cut of the paint on the front seats leaves the original space. However, when you memorize an image, this is not an obvious area in the original image.
Therefore, the cropping space is empty when you open the image and use layers in other image editing programs, as shown in the image below.
However, Paint 3D in Windows 10 saves transparent areas. Although the app is well-equipped but you can insert one picture over another to overlap.
This way, you can fill the transparent area on the left with the background image in Paint 3D.
- Type Paint 3D in the Windows 10 search box. If you don’t have a creator update yet, add Windows 10 to this site.
- Select this option to open the Paint 3D application below.
- Click Menu> Open> Browse Files, and select the image you want to open in Paint 3D.
- Next Click the Canvas button to open the sidebar, which appears directly at the bottom.
- Then Click the Transparent Screen option in the sidebar.
- Click ‘Select‘ and drag the selected rectangle to the area of the image you want to delete.
- Press Ctrl + X to draw the image as shown below.
As a result, the image is an empty transparent area that can be filled with any background layer.
- Click Menu> Save As Select 2D PNG.
- Enter the title of the file in the text, and click Save.
- Click Menu> New to open an empty art board.
- Select Menu> Open> B to open files. Select to open the background image of the infiltrated image.
- Click Menu> Insert to open the saved shared image.
- The transparent image opens at the top of the background layer, as shown in the following image.
- As you can see, the background image layer now fills the transparent area of the corresponding image.
- You can resize the corresponding image by moving the cursor to any corner of the selection box by holding down the left mouse button and dragging the cursor.
- To rotate the thumbnail layer, hover the mouse pointer over the rotating circle on the bounding box and then hold down the left mouse button. Drag the slider left or right, the selected layer clockwise or counterclockwise.
PNG Transparent Background on Photoshop
PNG is a type of image file with no background color. Most images contain a certain number of pixels and each of these pixels has a color, even if that color is white. There is nothing in the background pixels of the transparent background, so what’s behind it.
-
In this screenshot, you can see that he used transparent wallpaper under the Emergency Campaign logo because the blue behind him is lit.
Step 01: Insert the image into the editor
To get started, take a photo with Snagit or download the photo from the File menu. Ideal for images with a white background, monochrome, or high contrast.
Step 02: Click the Fill button on the toolbar and choose Transparent
This is relatively easy if you want to add transparent filler to your quick style for the first time. All you have to do is click on the fill color option in the properties of these tools and select the transparent fill.
Step 3: Adjust your tolerance
Changing the tolerance for this image is very easy because it is only black and white. But sometimes you have different colors. If you have a colorful background or gradient at the back, you can bleed characters, logos, etc.
One thing you can do is set the tolerance. One percent is the hardest, and 100 percent means all of your photos will be removed. You might need a fun toddler to get the right level of clarity. In this case, 90% can be effectively used for this brand.
Step 4: Save your image as a PNG
If you do not save the image as a PNG file, the background will be white.
All you have to do is remove the background from the image. These are just a few steps to give you the freedom to create the perfect image for your reading paper, sales materials, and exhibits.
Read More
How to Use Transparent Images On Photoshop | Transparent Images
Fastest Way to Remove White Background in Photoshop | Clipping Path