


Remove Background In Photoshop 2020 Online
Remove Background In Photoshop 2020 Online: Today We will show you the technique of the Remove background online in Photoshop 2020.The most common photo editing required for advertising and other purposes is to get rid of or replace the background.
For advertising, It’s fairly often the primary thing needed. the varied media of advertising like newspapers, magazines, fashion magazines, catalog, posters, flyers, etc. got to do that before doing other sorts of photo manipulations. For an extended time, a rapid increase of sell through e-commerce websites is happening . As a result, requirement for product photo background removal or replacement is increasing in no time .
Most of the time just removing background isn’t enough. Photographic corrections like brightness, contrast, levels, etc. etc. is required to be adjusted. If you’re not getting to do the image manipulation yourself, make certain to form confirm whether the image manipulation company goes to try to to this, as well. If you select knowledgeable graphic design firm you’ll get some corrections for free of charge . Because a reputed firm will attempt to produce the simplest outputs for the worth.
Open the Image
At first go to the file and open up here is a stock Image.We will crop it out at first in this portion and then just Ctrl J and then we’ll unlock this one.
Delete this one and after that press Ctrl T and you can make it bigger.after that hit the tick button and then make copy by pressing Ctrl J of this layer.
Quick Selection tools
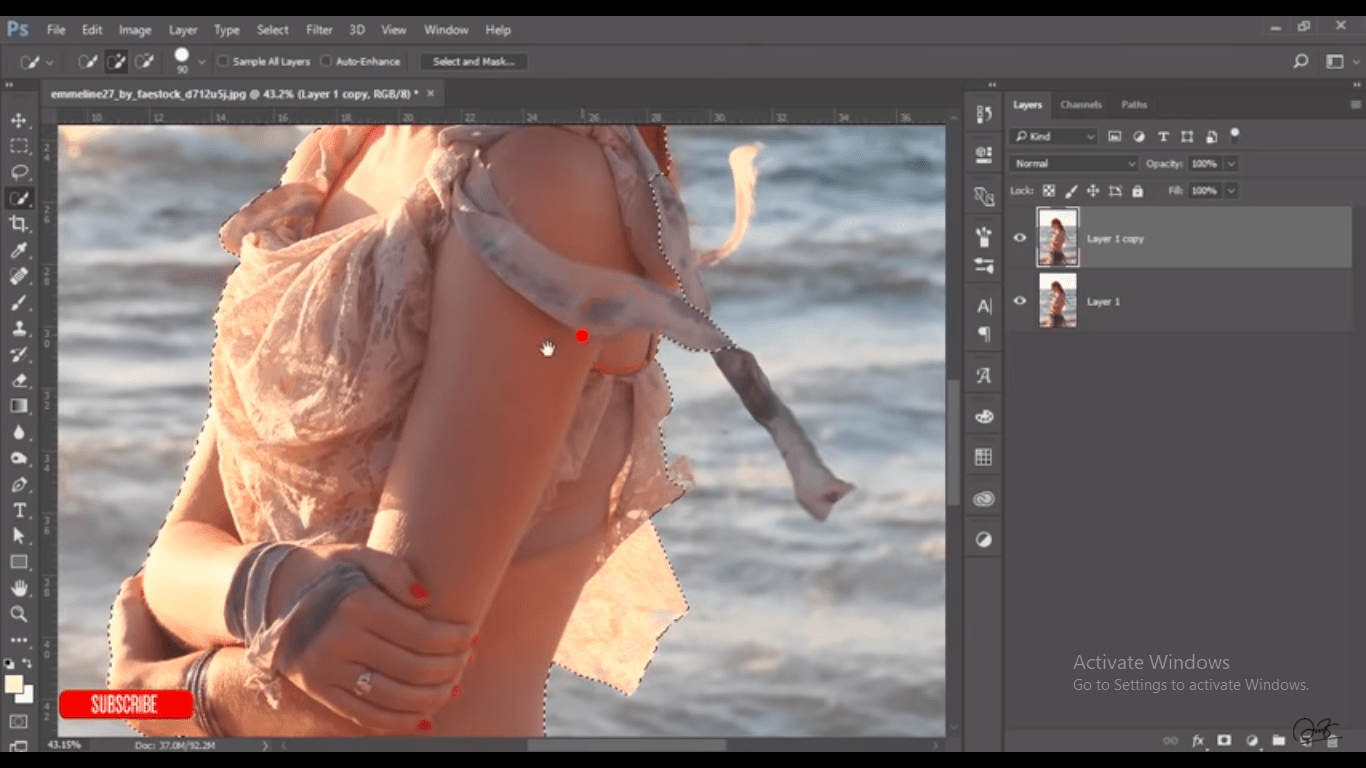
Select the quick selection tool or you can press the W from the keyboard. make the bigger size by pressing that bracket closing and just select the model Image.
When you are selecting please be careful have our selection. so, don’t miss out any Image Edge of the model so carefully. you have to select this out and select Image the plus option it will select and here in the area the portion of the model.
If you need you can just make the process smaller by pressing third bracket opening and just drag in the relevant area which one you want to select out. So, make it smaller and smaller as you want this portion.
This portion as well if you need you can just deselect any area place the alter butter and hold it and you can deselect any area so take time to select the model and the area. it will make your photography or the manipulation work more realistic. So,select this portion deselect this one place the alter button and deselect this part.
You can zoom it in or out if you need this one so here and make that radius bigger so that’s good and this Image Part. this portion as well so take maximum time to selection for the Image model. it will make more perfect for photography here this part of Image here some.
We’ll select it carefully here this portion here as well and this area and the highlighted area as well.it’s full fill from the selection here is the select and mask option control alter our position button and hold it press it.
How to Hair Refine Edge in Photoshop
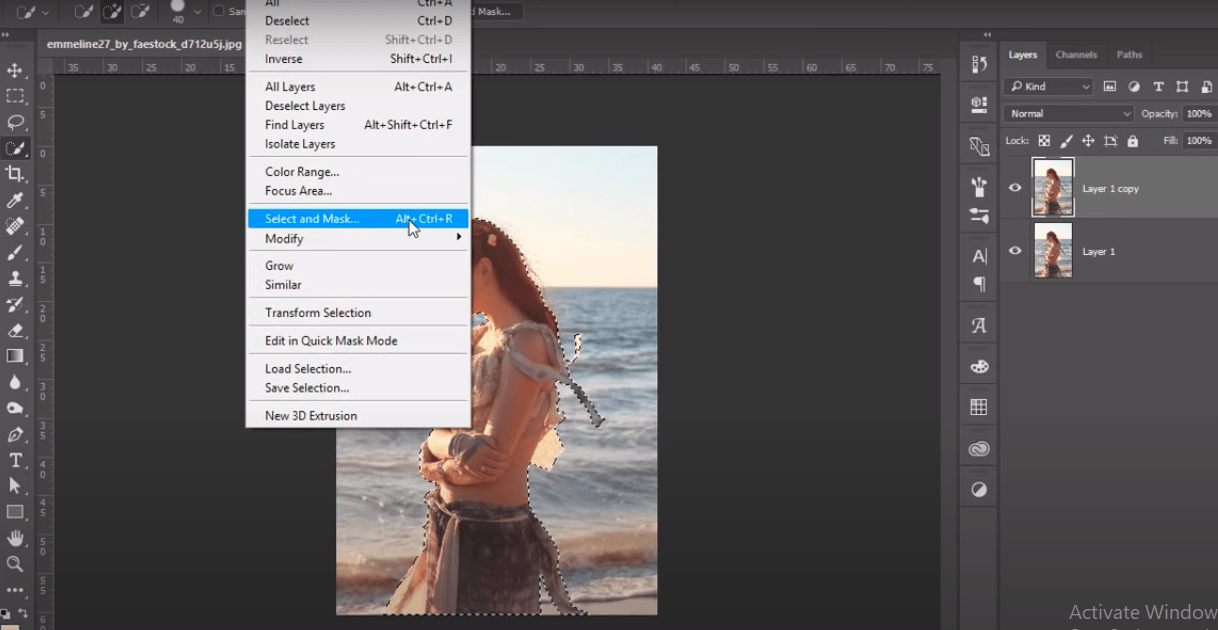
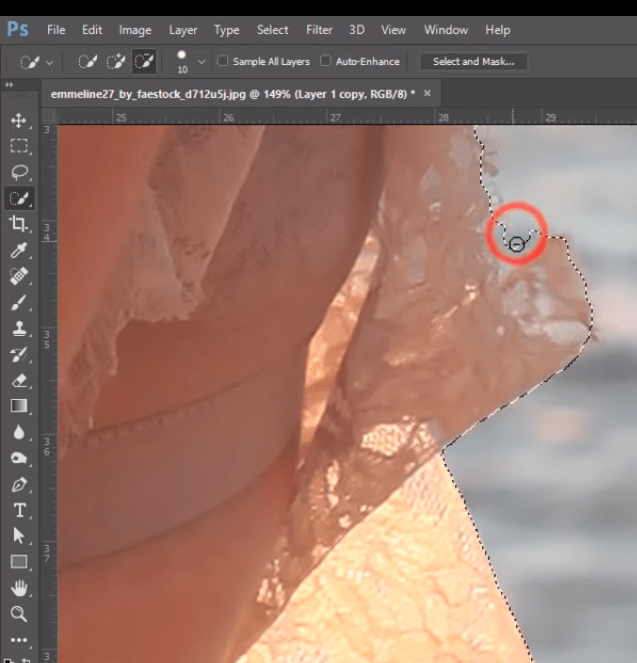
You will take time to in actors fine here is the refine Edge in Photoshop those Edge like the hair and other stuffs. We will refine Edge these portions so the setting everything will be like that the radius will be 7 point, 9 pixel, smooth will be 35 and feather 4.2.
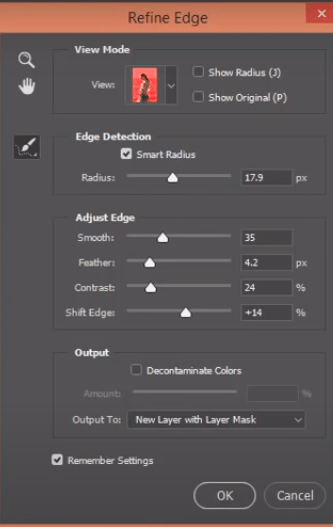
Contrast pin D4 fifteen plus 14 and here the the layer mask and this portion which you want to more refining please drag that Image Edge. it will help you out to make in the perfection. So, if you need you can make the radius bigger.
The Edge of Image is critical to select so it will define refining the edges and it will be more realistic. So, it will take time your own and give you the selection.
Remove The Background and Make it Transparent In GIMP
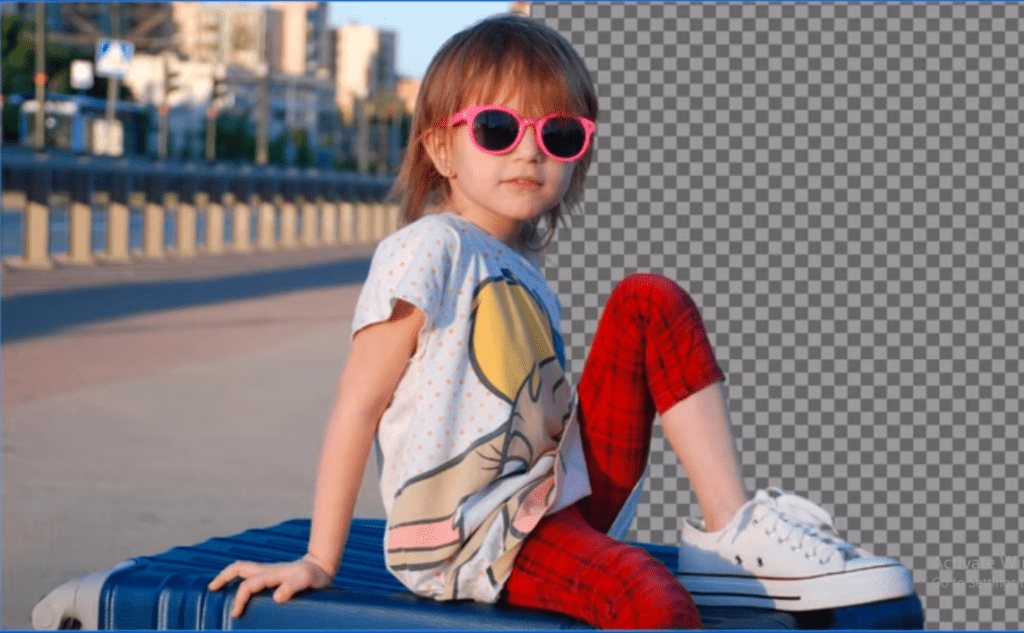
We are going to remove the background from an image and make it transparent.When we have opened Gimp, we go to file in the menu bar.Then we go to open.Search for the image that we want to use and open it.
Open The Image
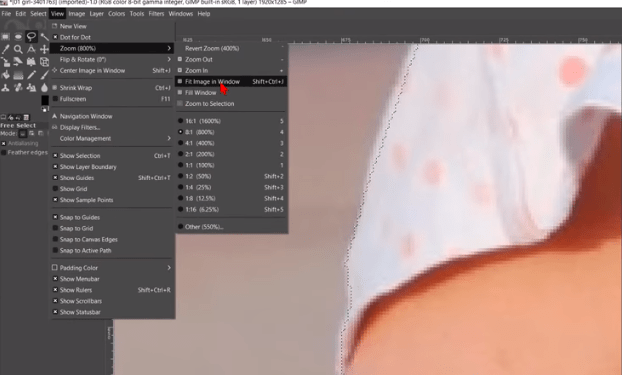
When your image does not fit in the window,you can go to view, zoom and fit image in window.Go to layer, transparency and hit add alpha channel.In the layers panel we can see that the font changes from bold to normal.This indicates that this layer now can have transparency.

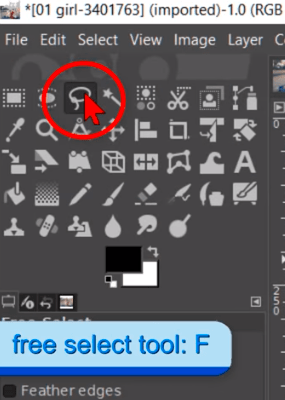
Although we are going to remove the background, we are first going to select our subject.There are many ways in which we can do this.One of the easiest ways is by using the free select tool.Click in the toolbox to make it active. Hold the Ctrl key and zoom in by rolling the mouse wheel.
We can click node after node to select our subject.But when you have a steady hand, you can also click and drag to make a line.Pressing the backspace key, lets us undo one or more previous made nodes.Then we can just continue.
Select The Tool
When We press and hold the mouse wheel down, the cursor changes into the move tool.We can then, by moving the mouse, move the image.Letting go of the mouse wheel gives us the free select tool again.
Remove Background In Photoshop 2020 Online: This moving of the image, can of course also be done with the scroll bars.Usually it is best to stay just a little bit inside the boundaries of our subject,when we make a selection.Selecting hair can be a bit difficult, but later on we will see ,how we can make it look better in this particular image.
When we are at the bottom of our image, we can just click outside the image and move to the other side. For the sake of the tutorial we will speed up the video until we are back at the first node.
Now we click the last node over the first node.Then hit enter or double click in the selection to apply it.
Go to view, zoom and click on fit image in window.With this image, there are several areas inside the selection that we also have to remove.Go to the tool options.
At the mode we click on the third button, which is subtract from current selection.Select the remaining areas in the same way as you did with the girl and the suitcase.
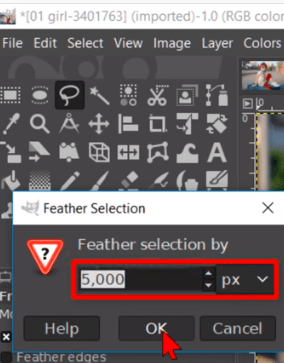
And again, we go fast forward,Click Ctrl+Sift+J to fit the image in the window. Go to select and click on feather.
Select Feather
We feather the selection line with 5 pixels, and click okay.In this way the edge of our selection is not so hard, but looks more natural.We have now selected the object, but we want to remove the background.Go to select and click on invert.
We can see at the marching ants at the edge of the image,that the background instead of the girl is selected.
Then we go to edit and click on clear to remove the background.The checker board structure that we see now, is the transparency.Go to select and hit none, to deselect the selection. Now we will work a bit on the hair, to make it look more natural.
Go to the toolbox and make the smudge tool active.Then we choose brush bristles 02.Change the size to about 15 or 20.
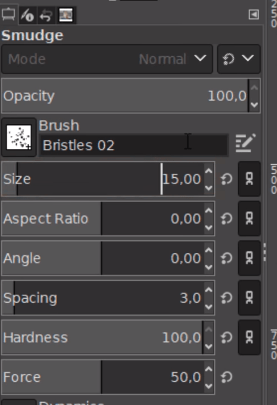
This depends also on the size of our image.Bigger image means bigger brush.Smaller image means smaller brush.Smudge the edge of the hair like so, to make it look more natural.
When this is done we go to view again.Click on zoom and fit image in window.Now to finish of, we are going to export our image out of Gimp.

Save Transparent in PNG
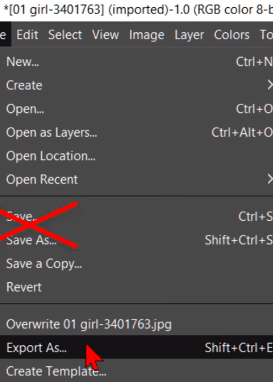
Go to file and click on export as.Contrary to what you would expect, we have to go to export or export as and not to save or save as.
Here we can search for the destination folder,And here we can give it a name, but do not hit enter yet.
Images with transparency always have to be exported with a PNG extension to keep the transparency.So, click on select file type,scroll down to PNG image and click on it.
The extension behind the image name is now changed to Png. You can also just type in the extension behind the image name.
Now we can click export and in the dialog that pops up, we can just click export again.