


How to use transparent images On Photoshop
In this tutorial, you will learn how to Use a transparent images from Photoshop. Save it as a .PNG file and keep it in a print-ready InDesign document.
Table Of Content:
2.Cutout Product and Transparent background
3. Remove White Background In Photoshop
6. Save your image in the proper web-ready format
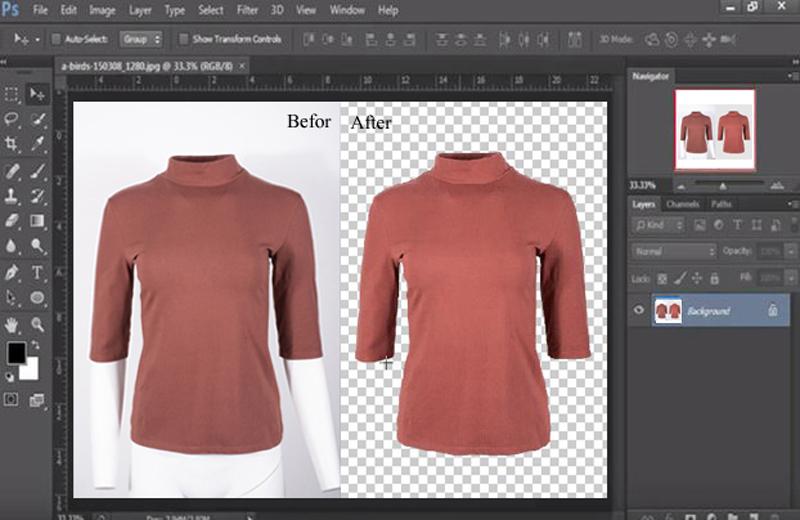
How To Make Images Transparent On Photoshop
Step 01
Let’s open the first image. To do so, press “Left” and then “Open” in the left-hand menu.
Step 02
Background Remove your layers. You can do this in several ways. If the background has a nice color, you can use a magic wand or a quick call tool. This tutorial wouldn’t work perfectly without focusing on cutting out the image from the background and then keeping the image clean and placing it in the Photoshop.
Step 03
Choose one of the following three groups.
“Magic Wand”
Clipping Pen Tool.
Mask + brush
Thank you for using these three methods to achieve the desired effect. But first, the “magic spell” is the best way to move forward. Finally, Magic Wand allows you to select all elements with just a few clicks.
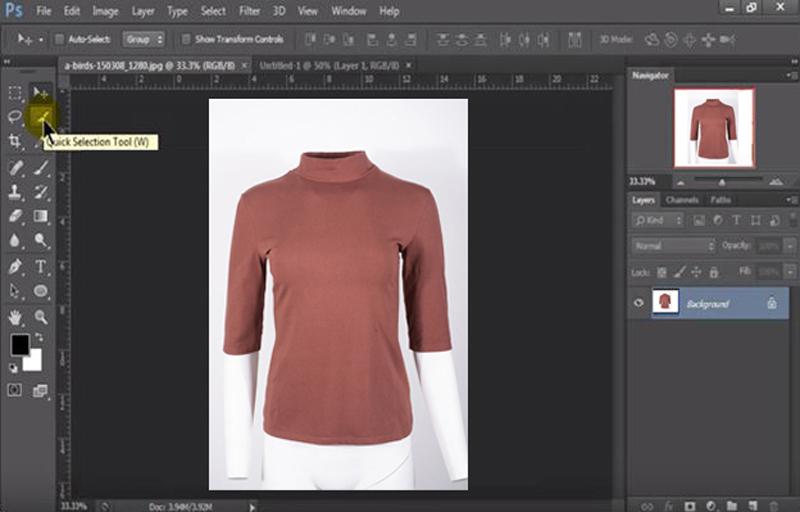
Step 04
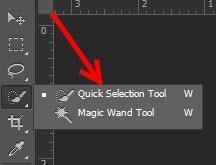
Select the Magic Tools toolbar from the toolbar on the left side of the screen and press “W”. If you don’t see the Magic Wand tool, it might be hidden behind the Quick Wand tool. If so, click and hold the Speed Wand tool and select the Magic Wand tool.
Once you have selected the magic wand, you can adjust the various parameters of the tool to control how many or how many you select each time.
At the top of the screen, you will see options to customize the behavior of the Magic Wand tool.
There are two ways to use the Magic Wand tool to define the photo theme: Select the background and select the theme. The method used largely depends on whether the photo background is in color or not.
Step 05
If the background consists of multiple colors, you can choose a picture theme instead of the background.
Photoshop CC18 has an option called Object Selection. This intuitive feature defines and chooses the subject of your photo, no matter how complex.
How to Use Select Subject to Remove background
Make sure you are in the duplicate layer (this should be highlighted in the Layers panel).
Choose the magic wand tool, but don’t click anywhere on the image.
Click the Select Item button at the top of the app. Now you have to choose the approximate topic.
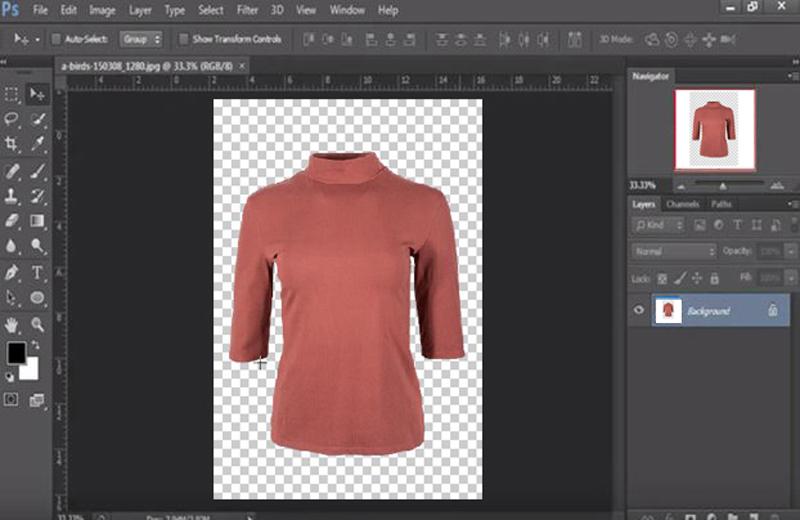
Click Remove from selection at the top of the screen. Then click on the subjective parts of the selection (like the shadows below this mandarin). This removes these fields from the selection.
If you are using an older version of Photoshop, you can use the Magic Wand Tool if the background is complex, but the theme usually has one color. Follow the steps in to define a theme. The only difference is that you don’t choose the reverse side after you’ve finished selecting.
How to Save an Images With Transparent on Photoshop
When you work with Photoshop, you create more and more images for different purposes. In addition to different types of images, Adobe Photoshop also allows you to create PDF files. When images are stored as PDF files, they are easy to transfer over the Internet, provide efficient rendering results, and are easy to manage. Adobe Photoshop also allows you to save images as PNG files, which are mainly used for web pages. PNG images can be easily attached to web pages, after which web pages are uploaded to the end user’s server.
PNG images are often used to create elegant logos and organization names. In this case, as an Adobe Photoshop designer, you may want to keep PNG images of style names and logos without a background.
When you save images visible in Adobe Photoshop, the images automatically add white backgrounds before they are saved as a PNG or JPEG file. In this way, the images no longer remain with a visible background and therefore do not function as stylistic objects at all.
This tutorial will show you step by step how to save PNG images from a visible source.
Save your image in the proper web-ready format
Creating a transparent background in Photoshop is only the first step; You need to ensure that the product image is saved in the correct format so that it will appear on your e-commerce website with a transparent background.
The best format for storing an image is PNG-24 format. This shape allows for multiple levels of transparency, which means that the image will not have a pixelated “halo” if placed against a different colored background. Older transparent file formats like PNG-8 and GIF can create this halo side effect, so use PNG-24 whenever possible.
To save a PNG-24 file in Photoshop CC, type SHIFT + ALT + CTRL + W (SHIFT + OPTION + Command + W on a Mac), or choose File> Export> Export As … from the drop-down menu at the top of the Mac window.
Note: If you are using an older version of Photoshop and do not see the Export As … option, you can select Save to Web and then select PNG-24 from the Presets drop-down menu on the right side of the dialog box.
In the dialog box that appears, under File Settings, under File Settings, change the PNG format and make sure the check box has been scanned. Do not scan the file (8-bit) today – this file. Turns out the PNG-8.
Image Resize with Transparent Background in Photoshop
On the left side of the image, you can see the expected file size for your PNG file. It’s important to note, because large files can slow down your web page loading. I personally prefer to keep web images about 200 KB or less.
To the right of the dialog box, under Image Size, you have the option to resize your image. Smaller sizes mean smaller file sizes. However, you do not want to make your image smaller than it appears on your website; This creates blurred or gray images.
Since many of your customers see your product on a mesh screen, keeping your product image 50% -100% larger than you expect is a good practice. This makes it crunchy on all devices. In other words, if you know your product is 400px wide, you want to build at least 600px here.
Yes, there is a small balance you need to work on to increase the size of your image while reducing the size of your file. To reduce shipping time, you can choose to resize images of only selected products for retina screens, and make sure that most of your product images are kept at their original size.
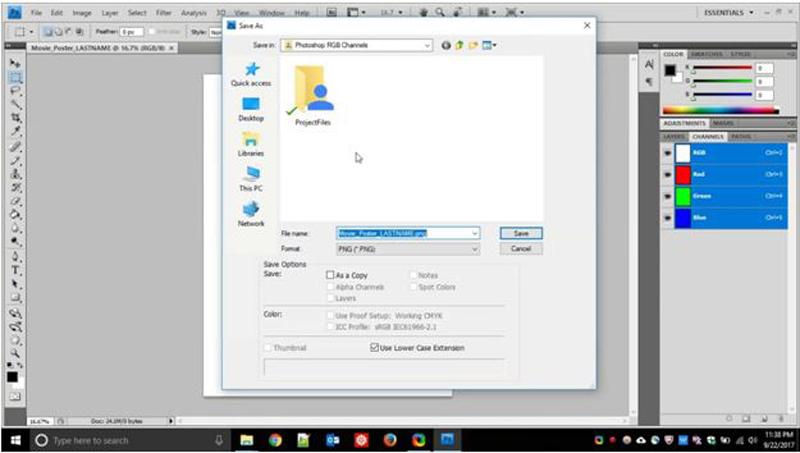
Once you’ve set your Image Size to proper dimensions, click Export All.
Name the image file and make sure its extension is set to PNG.
Click Save.
How to Use Transparent Images in PowerPoint
Do you want to spruce up your images with PowerPoint and think it can help?
This is a great hack for removing unnecessary noise from your show.
With this step-by-step guide, you can make your presentation clearer than before regardless of using PowerPoint 2010, 2013, 2016 or latest version. PowerPoint 2018.
Use Transparent Background images in PowerPoint
To make your background picture transparent using the Microsoft Office 365 Subscription Transparency Tool, you only need:
Select the image you want to make transparent
- Go to the Picture Tools Format tab
- Open options for transparency tool
- Choose from one of the predefined transparency options, or click Press Transparency Options to select a custom setting.
Currently, this new transparency tool is only available for one subscription to Microsoft 365.
I hope to be added to the standalone version of PowerPoint 2019 soon (but I’m not breathing).
Instead of making the background of your photo transparent, you can take a look at our step-by-step guide to removing the background of your photo here.
If you want to compress your images to reduce the overall file size, see our image compression guide here.
If you don’t have an Office 365 subscription, you’re out of luck!
Conclusion/ Final Images
You can skip the transparent PNG image and continue designing the document. Add text, images, etc. I added a color correction and deleted the PNG file in Photoshop. Using the Blur tool, I smoothed hard lines across the outer edge of the image. When you return the final PNG file to Photoshop, it improves the combination with the background image.