


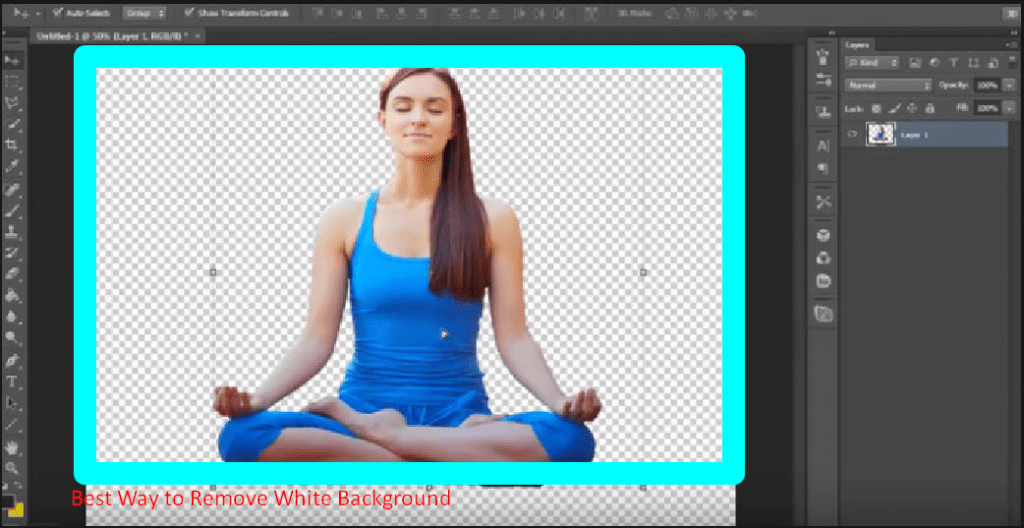
Removing the white background from an image can be a time-consuming and tedious task. However, there are several tools and techniques that can make this process easier and more efficient. One of the best ways to remove a white background is to use a photo editing software like Photoshop.
Who Needs Remove The White background from an Image
Removing the white background from an image has become an increasingly common practice in many industries. It is often necessary to remove the background to make an image more versatile and adaptable to different contexts. In this article, we will discuss some of the industries and individuals who may need to remove the white background from an image.
E-commerce Businesses
One of the most common industries that require removing the white background from an image is e-commerce. Online retailers often use images of their products to showcase them on their website or other platforms. However, to make these images more visually appealing and professional, it is often necessary to remove the white background. This allows the product to stand out more and gives the image a more polished look.
Graphic Designers
Graphic designers often work with images in their work, and they need to be able to manipulate those images to create unique designs. Removing the white background from an image allows graphic designers to use the image in a variety of contexts, such as on different colored backgrounds or within other images.
Photographers
Photographers may also need to remove the white background from an image. For example, if a photographer takes a portrait against a white background, they may want to remove the background to place the subject in a different context or to add a different background. Additionally, product photographers may need to remove the white background to make the product more visually appealing.
Social Media Managers
Social media managers often use images in their posts, and they need those images to be visually appealing and professional. By removing the white background from an image, social media managers can create posts that stand out and grab the viewer’s attention.
Web Designers
Web designers may also need to remove the white background from an image to create a seamless design on a website. By removing the background, they can blend the image more seamlessly with the website’s background and create a more cohesive look.
10 Best Way of Remove White Background from Image
Remove the white background from an image is a common task in graphic design and photo editing. In Adobe Photoshop, there are several methods you can use to remove the background, each with its own advantages and disadvantages. In this article, we will explore the 10 best ways to remove a white background from an image in Photoshop.
1. Magic Wand Tool:
The Magic Wand tool is a quick and easy way to select a white background. Simply click on the white background with the Magic Wand tool, adjust the tolerance to refine the selection, and press Delete to remove the background.
2. Background Eraser Tool:
The Background Eraser tool is a more precise tool for best background removal service. It erases the background while leaving the foreground intact. Adjust the brush size and hardness to achieve the desired effect.
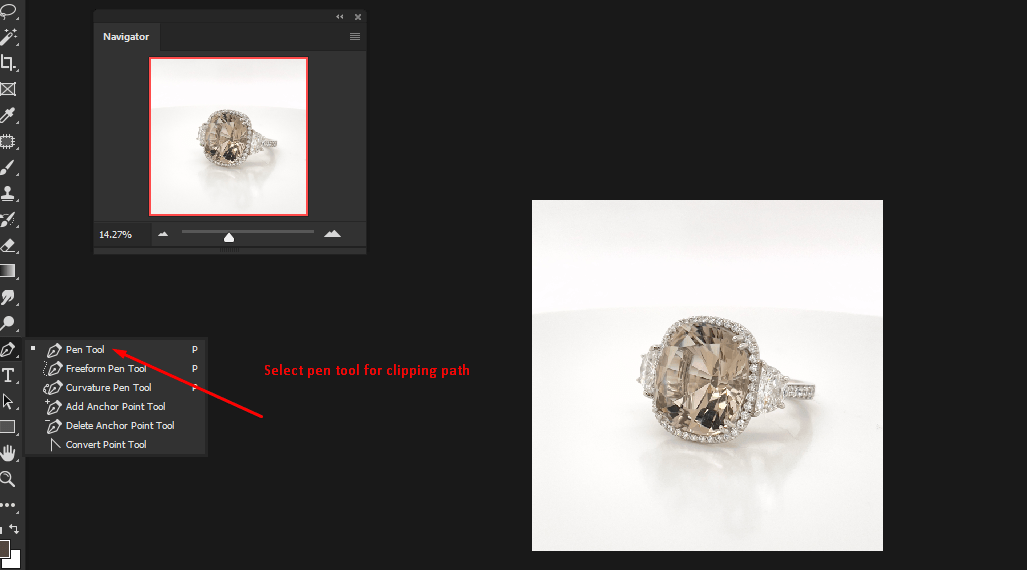
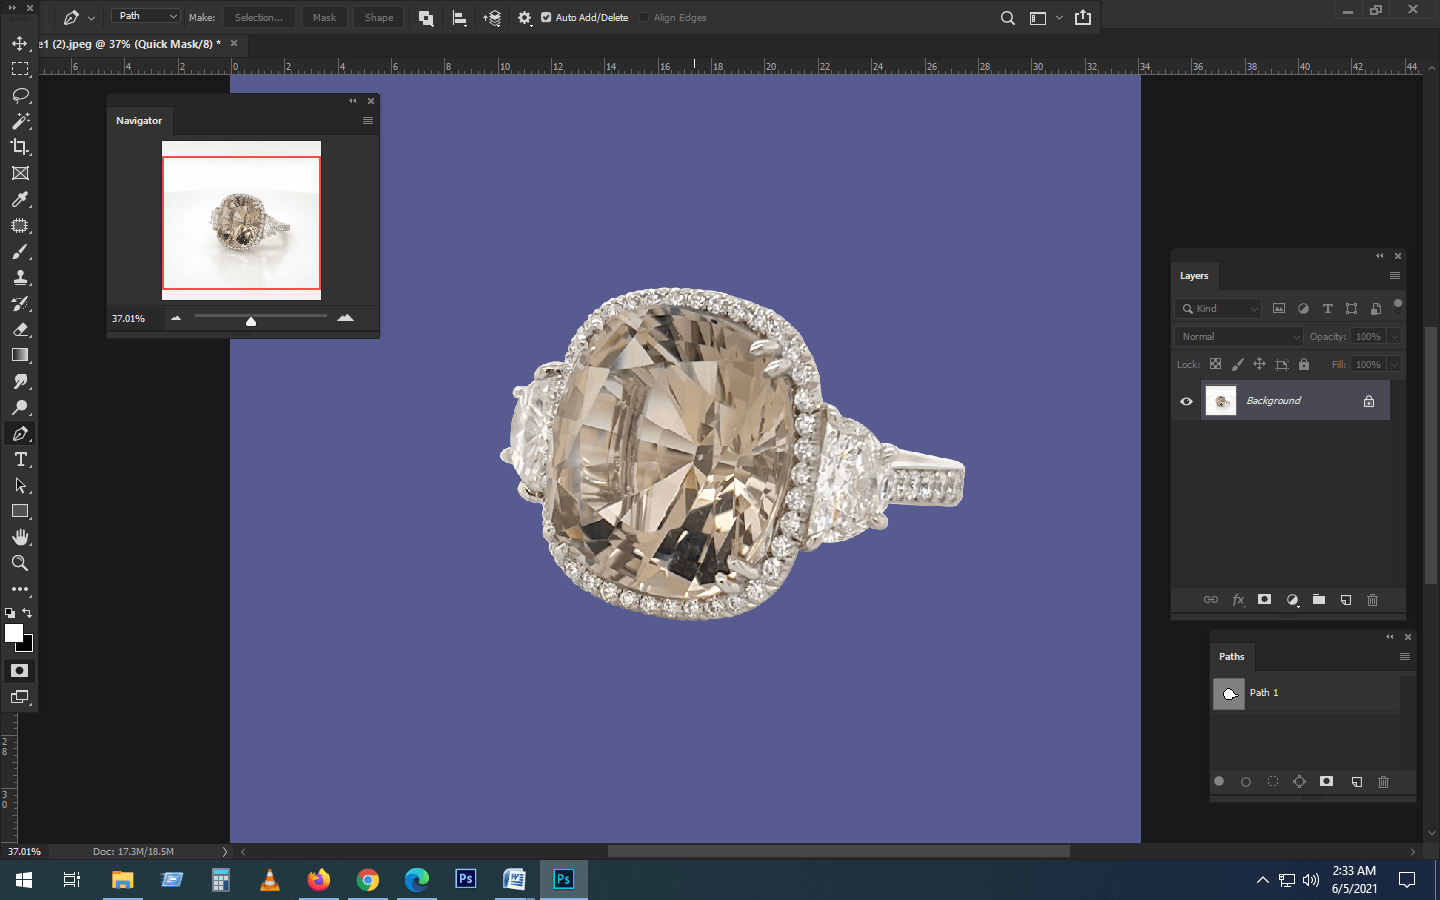
3. Pen Tool:
The Pen Tool is another precise tool for removing a white background. It creates a vector mask that can be edited later. It takes a bit more time to use than other methods but gives more precise results.
4. Layer Mask:
Layer masks allow you to non-destructively remove a white background. Simply add a layer mask to your image layer, paint over the white background with black, and refine the mask with the brush tool.
5. Channels:
Channels can be used to create a selection of the white background. Duplicate the blue channel, adjust the levels to increase the contrast, and use the Magic Wand or Lasso tool to select the white background.
6. Color Range:
The Color Range tool selects a range of colors, including white, that you can remove from an image. Use the eyedropper tool to select the white background, adjust the range, and press Delete to remove it.
7. Quick Selection Tool:
The Quick Selection tool is a fast and easy way to select a white background. Click and drag over the background, adjust the tolerance, and press Delete to remove it.
8. Refine Edge:
The Refine Edge tool allows you to refine the selection of a white background. Use the tool to adjust the edges of your selection and create a smoother transition between the foreground and background.
9. Select and Mask:
Select and Mask is a more advanced tool for refining selections. It allows you to adjust the selection’s edges, smooth the transition between foreground and background, and remove any remaining white pixels.
10. Magic Eraser Tool:
The Magic Eraser tool is similar to the Magic Wand tool but erases the white background automatically. Simply click on the white background with the tool and press Delete to remove it.
Remove The Background Fashion Industry Images in Photoshop ( Easy 6 Steps )
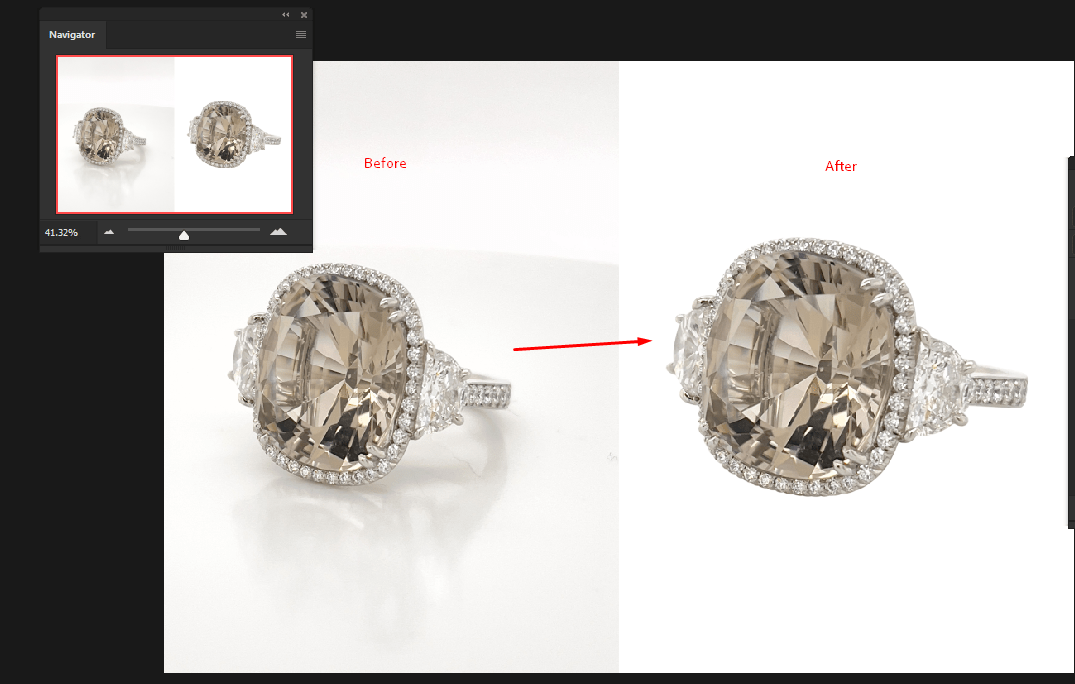
Removing the background from fashion industry images is an important task for photographers, designers, and e-commerce businesses. It can make images look more professional, clean, and attractive. One of the best tools for removing backgrounds from images is Adobe Photoshop. In this article, we will guide you through the steps of removing the background from fashion industry images using Photoshop.
Step 1: Open the image in Photoshop
The first step is to open the image that you want to edit in Photoshop. You can do this by going to File > Open, or by dragging the image into the Photoshop window.
Step 2: Select the Background Eraser Tool
Once you have opened the image, select the Background Eraser tool from the toolbar on the left side of the screen. This tool is designed to erase the background from an image while preserving the foreground subject.
Step 3: Adjust the tool settings
After selecting the Background Eraser tool, you need to adjust the tool settings to fit the specific image you are working on. The important settings to adjust are the brush size, hardness, and tolerance. The brush size should be large enough to cover the background area you want to erase, while the hardness should be set to 0% for a softer edge. The tolerance determines how much of the background will be erased. A higher tolerance will erase more of the background, while a lower tolerance will leave more of the background intact.
Step 4: Start erasing the background
Once you have adjusted the tool settings, you can start erasing the background by clicking and dragging the tool over the areas you want to remove. As you do this, you will see the background being erased and replaced with a checkerboard pattern, indicating transparency.
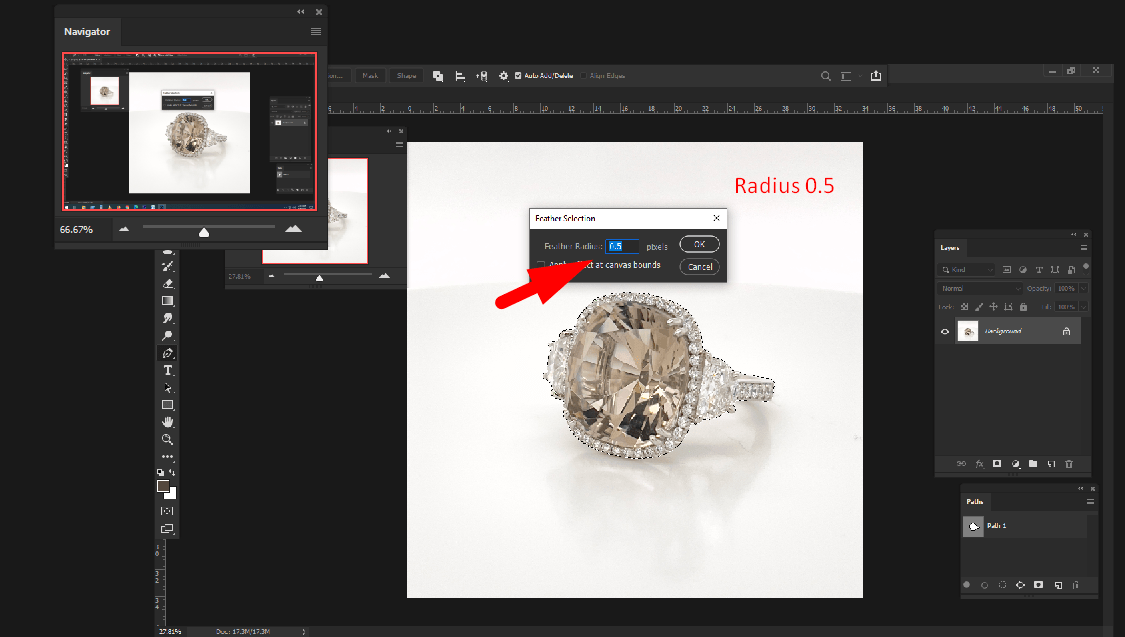
Step 5: Refine the edges
After erasing the background, you may notice some areas around the edges of the subject that still have remnants of the background. To refine these edges, you can use the Eraser tool or the Refine Edge tool, which is located in the Properties panel. Use these tools to clean up the edges of the subject and make them look more natural.
Step 6: Save the image
Once you are satisfied with the result, you can save the image by going to File > Save or File > Save As. Be sure to save the image in a format that supports transparency, such as PNG file or PSD file.
5 Best Background Eraser Tool with Transparent Background Photoshop
If you’re looking to remove the background of an image and create a transparent background in Photoshop, you’ll need a reliable background eraser tool. Here are 5 of the best background eraser tools with transparent background capabilities in Photoshop.
1. Magic Eraser Tool
The Magic Eraser tool in Photoshop is a popular choice for quickly removing backgrounds. Simply select the tool, click on the area of the background you want to remove, and the tool will automatically erase the surrounding pixels with a transparent background. It’s fast and efficient, but keep in mind that it’s not always accurate, and it may remove too much of your image.
2. Background Eraser Tool
The Background Eraser tool is another popular option that allows you to erase the background of an image with precision. This tool works by sampling the colors around the area you want to erase and removing any pixels that are similar. You can adjust the brush size, tolerance, and sampling limits to achieve the desired level of accuracy.
3. Pen Tool
The Pen tool is a powerful and versatile tool that allows you to create precise selections around the edges of an object. It may take some practice to master, but it’s worth the effort if you want to achieve a professional-looking result. Once you’ve created your selection, you can easily remove the background and replace it with a background transparent one.
4. Lasso Tool
The Lasso tool is a simple but effective tool for background removal. It allows you to draw freehand selections around the area you want to remove, and then you can delete or erase the selection to create a transparent background. It’s not as precise as the Pen tool, but it’s a good option for removing backgrounds with irregular shapes.
5. Color Range Tool
The Color Range tool in Photoshop allows you to select and isolate specific colors in an image. This tool is particularly useful when you want to remove a background that has a distinct color or range of colors. You can adjust the range of colors you want to select and then delete or erase them to create a transparent bg.
Step-by-Step Guide: How to Remove a Green Screen in Photoshop for Stunning Photos
Green screens have become an essential tool in the world of photography and videography. They provide a simple way to remove a subject from their background and place them in a new environment or scene. In this step-by-step guide, we will explore how to remove a green screen in Photoshop and achieve stunning photos.
Step 1: Open the Image in Photoshop
The first step is to open the image with the green screen in Photoshop. To do this, launch Photoshop and click on the “File” menu, then select “Open” and browse for your image. Alternatively, you can drag and drop the image into the Photoshop workspace.
Step 2: Select the Green Screen Background
Next, we need to select the green screen background. Click on the “Select” menu, then choose “Color Range.” In the Color Range window, click on the green background with the eyedropper tool to select it. You can adjust the range using the fuzziness slider until you have the desired selection.
Step 3: Create a Layer Mask
With the green screen background selected, click on the “Layer” menu, then select “Layer Mask” and choose “Hide Selection.” This will create a layer mask that hides the selected green background, revealing the subject.
Step 4: Refine the Layer Mask
In most cases, the layer mask may not be perfect, and there may be some green edges around the subject. To refine the mask, click on the layer mask thumbnail in the Layers panel and use the brush tool to paint over any remaining green areas. You can also use the refine edge tool to refine the mask further.
Step 5: Add a New Background
Now that the green screen is removed, we can add a new background. Click on the “File” menu, then select “Open” to choose the new background image. Drag and drop the new background image into the Photoshop workspace and place it behind the subject layer.
Step 6: Final Touches
Finally, make any final touches to the image, such as adjusting the color, contrast, and brightness, to ensure that it looks stunning.
Conclusion
Removing a green screen in Photoshop can seem daunting, but it’s a straightforward process that can result in stunning photos. With this step-by-step guide, you can easily remove the white background and add a new background, giving your photos a professional look.