


How to create glare product photography photoshop white background
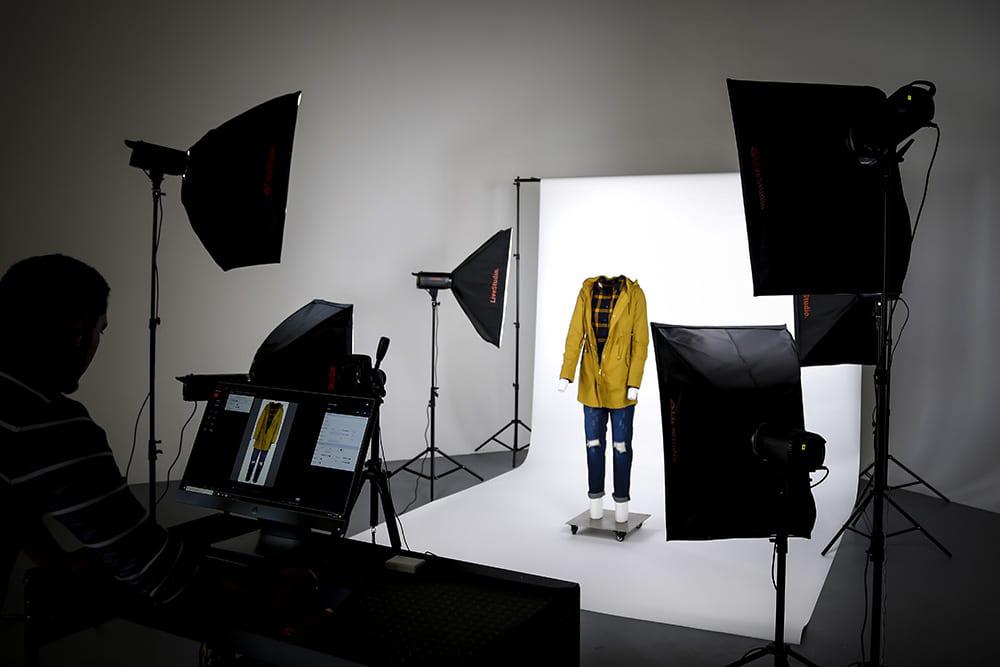
How to create glare product photography photoshop white background – A DIY product Photography is a key to marketing, advertising, and sales. Not to mention the news catch.
However, transferring products to a professional photographer can be expensive. It’s also completely unnecessary if you know what you’re doing (and doing your own photo tricks!)
In essence, light is created when a light source comes in contact with the surface of the reflection. It can be seen everywhere from eye contact and glasses, taking photos up to the reflectors on the surface of the water system. A bright visible window is sure to be noticed if you try to take a picture through the car window!
Why White Background Product Photography?
1. They Make Your Products Pop
The advantage of choosing a background color means unity of requirements; White does the finest job of creating a variety of colors and textures. If you want your products to appear with small variations, wallpaper is the best way to do that.
2. They offer more diversity to all marketing channels
If your budget is limited, you want to make sure that the photos of the products you make can be used in your marketing. In a Google Shopping campaign, photos of your products can only have a white, gray, or light background. If you decide to become a multi-channel retailer and bring Amazon to market, one of the conditions for these photos is a pure white background (RGB 255, 255, 255).
3. Gives your product the focus it deserves
The white background allows your product to be the center of attention. I LIKE a well-styled photo. I think it can be very important for the height of your product’s overall performance. But when you are online, sometimes you just need a photo without touching the customer to imagine it in his life + at home.
Product Photography White Background Photoshop
Creating a White background to take a product or offer e-commerce is easy, no matter how you know it!
1. Equipment requirements
For many of the pictures I took on a white background, I have a studio light or two with modifiers and occasional window masks and flags to make sure brightness is not an issue.
The light modifiers I use to illuminate the background mainly depend on what I shoot and how much background I can see. When shooting a small subject indoors, sometimes I can escape with a reflector lamp. If I work in a large area, I need to use two lights with modifiers such as small octave boxes or wide-angle reflectors to distribute light evenly over a large area.
Radiance is something that can occur when shooting against a white background because too much light can reflect off a white surface and go out of the lens. As a result, the object will wash out and look clearer than it actually is, so having a window mask or polypropylene on hand can be helpful. Again, you will see what I do in the Create White Backgrounds course. Overall, good background techniques mean that explosion should not be a problem. Window flags and masks are more protected from bright spots that affect the main subject, such as backlight.
Learn More:
How to Make The Background White in Photoshop CS6 | White BG
2. Lighting settings for white backgrounds
You will find many white lights in the product category with many products on our site, but here I will guide you through the three most popular options.
If you work in a small studio with a small lamp, one lamp may be enough. If you have a small amount of produce, a light at the back should be enough to produce the new white product needed in this area.
For this preparation, which is shown in the product package process directly, you need to place a lamp behind the product to illuminate the back. I often use radiation for this situation because it provides uniform light distribution and is easy to distribute if you work in a small space and need a lighter area.
Because this site is ideal for studio users, it is a good choice for anyone taking e-commerce photos for the site.
4. White-on-White Photo Retouching
When you’re done exposing and taking photos, use Photoshop or other editing software to remove the background from the images you need. Depending on how you want to lighten your product, you can get strong or relatively soft shades. Removing shadows in post-production is always better than adding more light than providing the image to the camera. Hiding an object is very simple.
You can remove the background yourself or transfer it to a professional retouching company like Pixel. Either way, your final images need to be completed and displayed perfectly:
The recommendations also apply. You need to do some research to make the product look visible. However, the process in this tutorial will give you a good start. Once you know the basics of the shooting process, you and your team will have no trouble taking a white photo on a white background.
How to Quickly Make a Background White in Photoshop
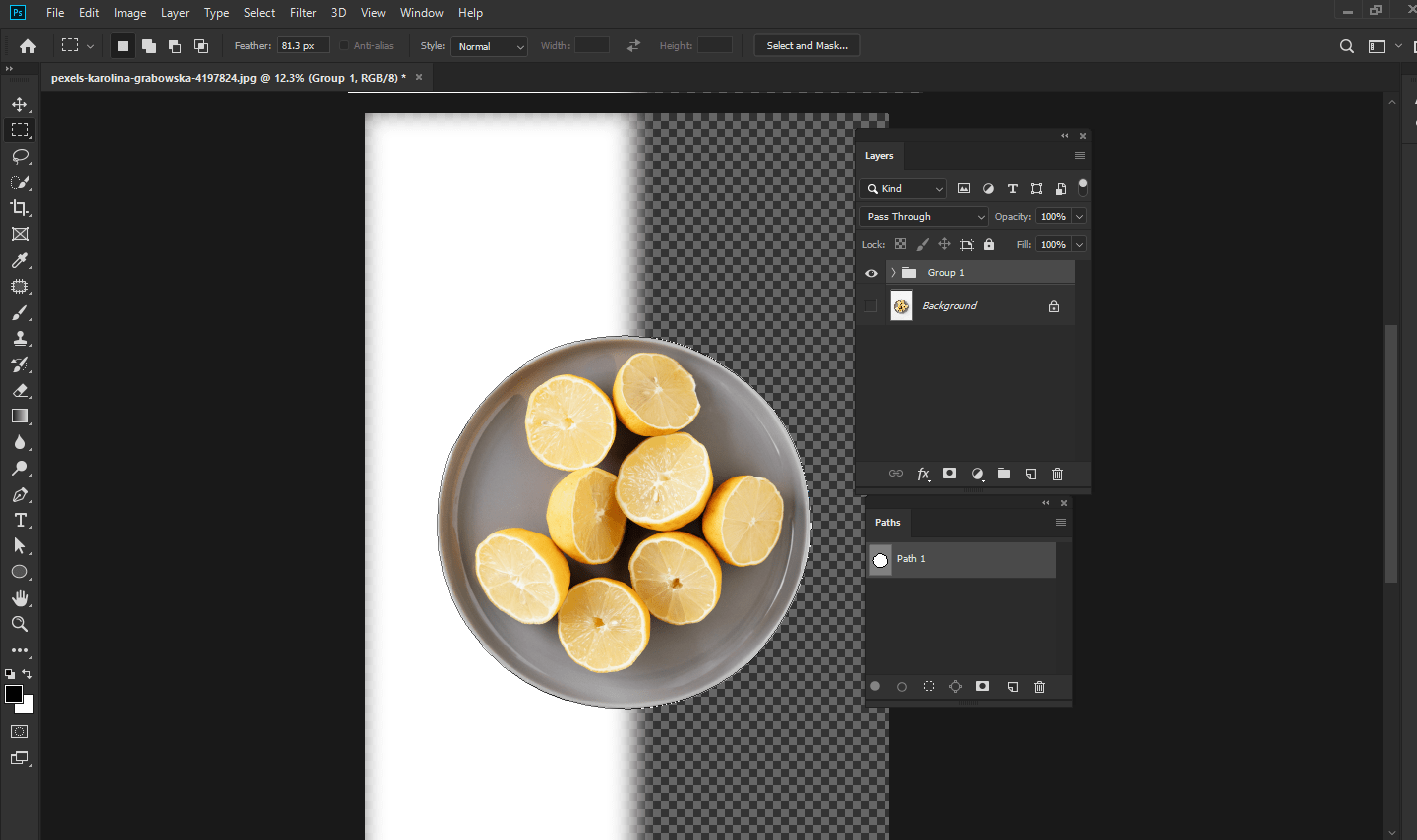
This guide explains how to remove background images from Photoshop CS6 using the Magic Wand tools and Shortcuts. Depending on your needs, you can use transparent images to add beautiful background images to documents, presentations, and websites.
Read More:
Fastest Way to Remove White Background in Photoshop | Clipping Path
Photoshop Tools Overview:
Background Eraser (E):
Change some layer colors to be transparent by clicking and dragging.
Rubber (E):
Change parts of the layer to be transparent by clicking and dragging.
Layer panel:
This shows all layers in the document. When a specific layer is selected, your actions only affect that layer.
Magic Eraser (E):
Change all pixels in the same way as transparent by clicking on a certain color.
Lasso magnetic device (L):
Select an object with a magnetic dot attached to the edge of the object. Add points by clicking and dragging the cursor. Delete a point by pressing the backspace key (Windows) or delete (Mac).
Magic Wand Tool (W):
Select similar pixels by clicking on layers.
Move Tool (V):
Move objects to specific layers by clicking and dragging them from the Photoshop workspace.
Quick selection tool (W):
Select an item by clicking and dragging.
Workspace:
The area around your photo.
Refine Your Selection With the Quick Selection Tool for white Background
TO DELETE part of the selection, CLICK CLICK the WALL icon in the vertical toolbar. Click to access QUICK TOOLS. In the horizontal toolbar, click the SELECTION PLOT icon.
To add a smaller section to your selection, follow the instructions above to select and edit the QUICK TOOL SELECTION. Click the Add to Selection icon.
Choose a breast size: Use a smaller breast size for details and use a larger brush size for larger areas. To resize the brush, click the down arrow to the right of the Push from Options icon and drag the slider to the right (larger) or left (smaller).
Once you have selected your average breast size, CLICK AND MARK the quick selection tool to add or remove parts of your choice.
Related Articles:
How to Get Refine Edge in Photoshop CC | Clipping Path Client Inc.